How To Make Lemongrass Soap
In our previous post, we covered the numerous benefits of lemongrass soap, and how it’s great for removing dead skin cells from dry skin. That’s why we totally understand the desire to make natural lemongrass soap at home!
At Crate 61, we got our start in the soap business making DIY products in our kitchen, so we’re always happy to encourage others along the way. That’s why we’re providing detailed instructions for a simple, small-batch lemongrass soap recipe: perfect for beginners and experts alike!
What Is Cold Process Soap Making?
If you’re looking for new DIY projects, natural soap making is a surprisingly easy hobby – all you need are a few specialty ingredients, some common kitchen appliances, a well-ventilated space, and a recipe. There are many different ways to make handmade soap, but most homemade soap recipes use a cold process. Simply put, the cold process uses lower temperatures when making soap, which makes it the safest option for beginners.
Lemongrass Soap Ingredients & Equipment
For this homemade lemongrass soap recipe, we’re going to need a lot of oils. There are two main types of soaping oils we need: solid oils and liquid oils.
For our solid oils, we need:
8oz of Coconut Oil
4oz of Cocoa Butter or Shea Butter
These oils will combine with lye to become solid soap.
For our liquid oils, meanwhile, we need:
14oz of Olive Oil or Canola Oil
2oz of Castor Oil
These oils are meant to add colour, fragrance, and cleansing properties to our soap. They’re different from our essential oils, which will be added at a different time.
Our essential oils include:
4 tsp of Lemongrass Essential Oil
8 drops of Grapefruit Seed Extract
And finally, there are a few more essential ingredients we need:
1/16 tsp of mineral powder, like Mica Powder or Yellow Iron Oxide
3.8oz of lye crystals
7oz of water
As for equipment, we need a few special kitchen appliances, including a large stainless steel pan or double boiler, digital thermometer, digital kitchen scale, milk frother, and an immersion blender. It’s also good to purchase a silicone soap mold in advance, though you can always improvise.
For personal safety, wear protective eyewear, latex or rubber gloves to protect your skin, and make sure to tie your hair back, if necessary. There are certain risks involved in working with lye and high-temperature ingredients; we always recommend you measure out your ingredients and prepare your equipment beforehand to ensure a smooth experience.

Step 1: Combine Your Coconut Oil & Cocoa Butter
Measure out your solid portions with a digital scale, then combine your solid oils in the stainless steel pan. Next, mix your liquid oil together in a jug or other glass container.
Save one tablespoon of your olive or canola oil for colouring purposes (We recommend olive for its subtle, natural green). In a glass, combine this one tablespoon with mineral powder. Use your milk frother to blend until fully combined, then set aside the coloured mixture for later use.
Step 2: Create Your Lye Solution
This is the trickiest step. Find a well-ventilated area in your kitchen, like a spot near an open window or door. In this area, pour 7oz of room temperature water into a glass jug. Next, add your lye crystals to the water – never the other way around. They will instantly cause a reaction, producing heat and steam that will make the jug grow warm. Using your spatula, stir the crystals until they dissolve, making sure to keep your face away from the steam. Once fully combined, place the lye water in a basin of water to cool.
Step 3: Heat & Mix Your Oils
Place the pan on a burner at the lowest possible heat. Once the solid oils have completely melted, take the pan off immediately and stir until all floating bits melt. Then, using a sieve, pour your liquid oil and colour mixture into the melted oils.
Step 4: Check The Temperature
Using your digital thermometer, take the temperature of both your melted oil solution and lye mixture. They should be within 10 degrees of one another, between 100 and 120 degrees Fahrenheit (your lye solution should never be hotter than 120, however). If they aren’t in this range, continue to melt or cool your solutions; once ready, pour the lye solution into your steel pan, using a sieve to filter out any undissolved crystals.
Step 5: Bring Your Solution To “Trace”
After making sure everything is turned off, immerse your stick blender into the soap mixture, tap out any air, and give it a few test pulses. We recommend you keep your stick blender close to the bottom of the pan to minimize splatter. Once comfortable, blend the soap batter until it’s thick, chunky, and has the consistency of pudding. This is called reaching “trace.” The mixing process should take fewer than 10 minutes as the oil and lye combine to form soap; from now on, you’ll have to work quickly, or the soap will begin to harden in the pan.
Step 6: Add Lemongrass Essential Oil
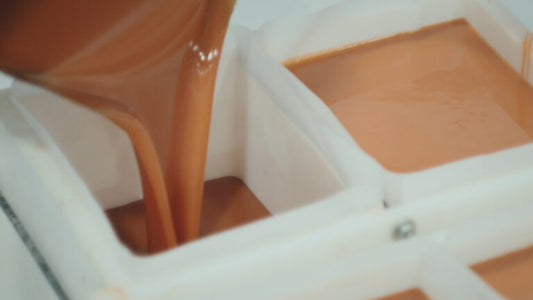
Once you’ve reached the trace, add your lemongrass oil and grapefruit seed extract. Feel free to add another essential oil, natural colourants, or raw ingredients, like oats or poppy seeds. Adding them after trace prevents your lemongrass oil from turning into soap, preserving its natural benefits. Stir thoroughly to get rid of any streaks, and pour your natural soap into the silicone loaf mold.
Step 7: Insulation & Cooling
Place your soap loaf into a dark, dry location, like a cool oven or cardboard box. Seal any potential openings with a towel or plastic wrap to keep as much heat in as possible. The more heat you keep in, the longer your soap has the opportunity to “gel,” which gives your soap a richer, deeper colour.
Step 8: The Long Wait
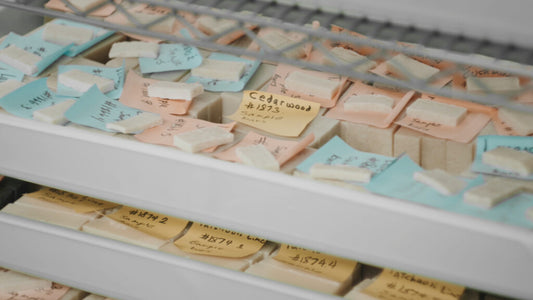
For the last step of our soap recipe, pop your soap loaf out of the mold, then measure and cut it into even bars with a sharp kitchen knife. Space out your bars on a wire rack or sheet of parchment paper, in an aerated location with no direct sunlight. Now we have the hard part: leave your soap alone for a month. This will “cure” the soap, as any remaining water evaporates, strengthening the scent and colour of your bars.
Finally, after four long weeks, your soap is ready to use. To preserve that fresh lemon scent, seal your bars in a separate container. Don’t be discouraged if the recipe doesn’t turn out; it’s normal to make a few mistakes on your first batch, and your next batch will always be a little better! Good luck!


